Integrating Residential Proxies with AdsPower
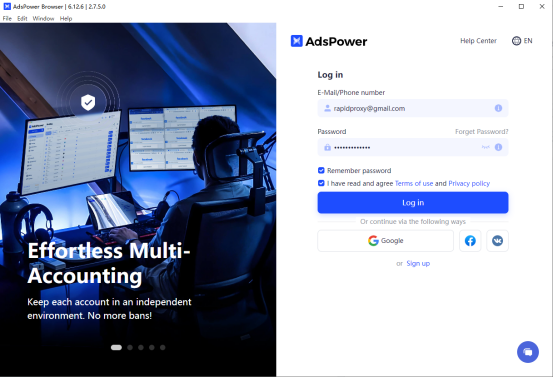
Step 1: Log in to Adspower
Open the Adspower browser and click on 【Log in】 to access your account.
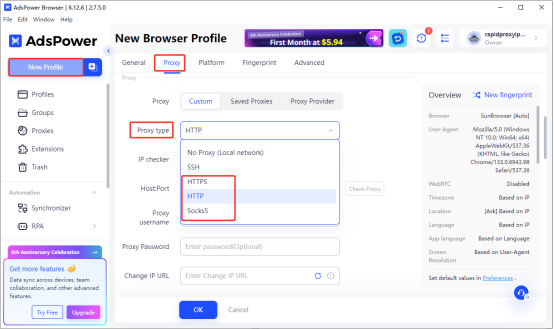
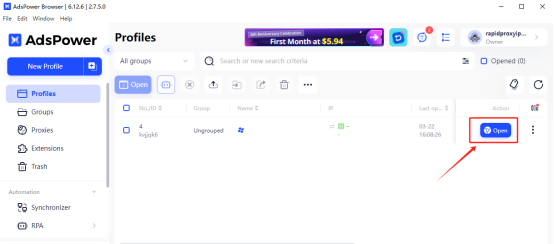
Step 2: Create a New Profile
Click on 【New Profile】 and select 【Proxy】.
Find 【Proxy type】 and choose the 【HTTP】 protocol.
Note: This example uses HTTP. Please be aware that RapidProxy supports HTTP, HTTPS, and SOCKS5 protocols.
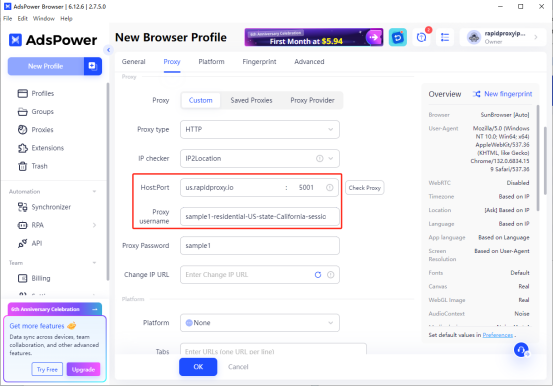
Step 3: Enter Proxy Information
Paste the proxy information generated by RapidProxy into the corresponding fields in Adspower.
How to Get Residential Proxies by APl?
How to Get Residential Proxies by User & Pass Auth?
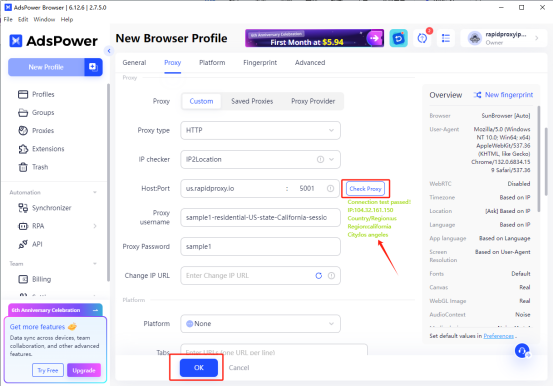
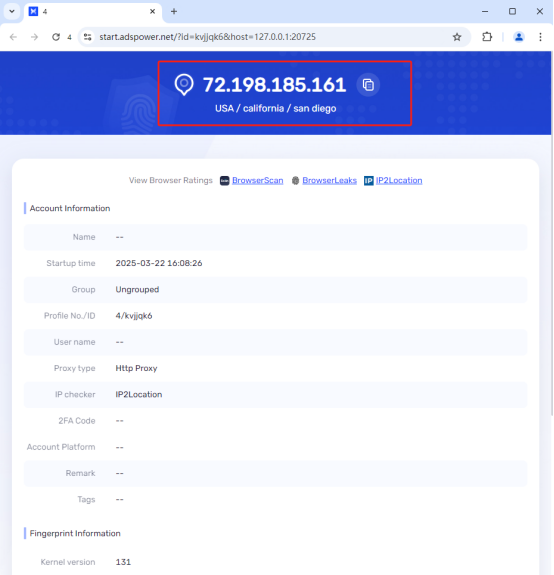
Step 4: Check Proxy Connection
After completing the configuration, click on 【Check Proxy】 to test the proxy connection.
If everything is working correctly, you will see the message “Connection test passed!”
At this point, you have successfully set up the proxy. Click 【OK】 to save the proxy configuration.
Step 5: Start Using the Proxy
Click on 【Open】 to begin using the configured proxy.
You can now safely conduct online activities using the configured proxy.
If the proxy cannot connect, please follow these steps:
1.Verify that the proxy information (IP address and port) is correct.
2.Ensure that your network is set to an overseas environment.
3.If the issue persists, contact customer support for assistance.
Grow your business with RapidProxy
Follow Us


Contact us


 Flux Stream Network Limited
  RM A5,7/F, ASTORIA BUILDING, NO.34 ASHLEY ROAD, TSIM SHA TSUI, HONG KONG
Language
DuoPlus Cloud Phone
Undetectable browser
vmoscloud
SMS-Activate
GeeLark
CrazyFB.shop
Overlaxed Cloud
Affiliate.Watch
TK Cloud Master
hoax.tech
AdsPower防关联浏览器
Maslogin
RentPhone USA
CaptchaAI
SpyOver
White Link
vmcard virtual card
AccFarm.org
Fire ACCS
VaxeLabs
Hiddence
Accsmarket
出海视频独立站
BitBash
Daddy-Store
Gologin
ExitAnty
TrueAccs
Buvei
spy.house
OpenWeb Ninja
品牌出海海贸会
Laurel Agency
HotCpa.top
ReadyAccs
Web Proxy Per Tab
Telegram Expert
EpicPWA
Hotlogin Browser
TWT Chat智能客服
TikTok海外专线
花漾指纹浏览器
XMart - Digital marketplace
ALISMS.ORG
Buddha Store
Cloaking Master
达卖
hstock.shop
Arbi.Store
飞雁畅联-AI增长引擎
NPPRTEAM
VMLogin指纹浏览器
芝麻教程
AIScrapers
全球实卡接码平台
Veryfb
Incogniton Browser
GDT Agency
CrownSoft WhatsApp Filters
LegitSMS
MostLogin
ZeroCloak
TYVER AD SPY
Rents.WS
MadBid.com
Hubstudio
Bit Browser
MuLogin指纹浏览器
PricingCraft
CPAEXCHANGE
Cloaking.House
DICloak Antidetect Browser
一合跨境
TGX account
Captchasonic
HQ-ACCOUNTS.COM
见远领航
见远跨境
BOB FARM
Money Safe
独角兽SCRM翻译器
风象出海
OMNILOGIN
WhitePage.House
CAPTCHAs.IO
SocialEcho
蘑菇跨境
0DETECT
SocNet
FlashID
棱镜浏览
零录AI
GenZolo Agency
CRAZYSHOPS.RU
Pay2.House
Omocaptcha
Moimobi 营销云手机
SMSBOWER
Antic Browser
FuncCards
MTWSPY
Linkbuilder
Vibero CRM
Adligator
MaxCloudPhone
deiter-shop.ru
VPN.Promo
Scrappey.com
候鸟指纹浏览器
Onirent
AccountDiversity
Spyteg
智纹防关联指纹浏览器
temp mail by boomlify
Zenattica ads accounts
ToDetect IP Detection
UniMessenger
AgentNuts
CheckVcc
WarAccounts
出海吧123
途纹浏览器
HWZYK海外媒介资源库
RealAccs
AI矩阵获客系统
IP Testing全球在线IP检测
IP检测
TakeFlow云手机
LumiTok 达人营销平台
Magic Click Partners
cloakerly
AbcFinger指纹浏览器
Tgebrowser指纹浏览器
Dashnull Anti-detect browser
BrowserDoctor
锦品出海
NexusOrch
跨境卖家参谋
PayTrades汇通国际支付
汇通全球卡
Rilna
BeastBrowser
GetFollow
Gen White Page
HaiWang Navigation
Linken Sphere
Dolphin{anty}
FAN Browser
LALICAT Browser
Antidetect Browser Hidemyacc
PionLogin
星火指纹浏览器
IP Detection
GenLogin
pro-ak.store
SpiderBox 虫盒
MultiLoginPro
Gemlogin
GenFarmer
MostLogin
MoreLogin
NoCaptcha AI
VMLogin指纹浏览器
XLogin Antidetect Browser
BrowserScan
FB-Killa
© 2025 RapidProxy.io. All Rights Reserved
PAYMENT METHODS:
