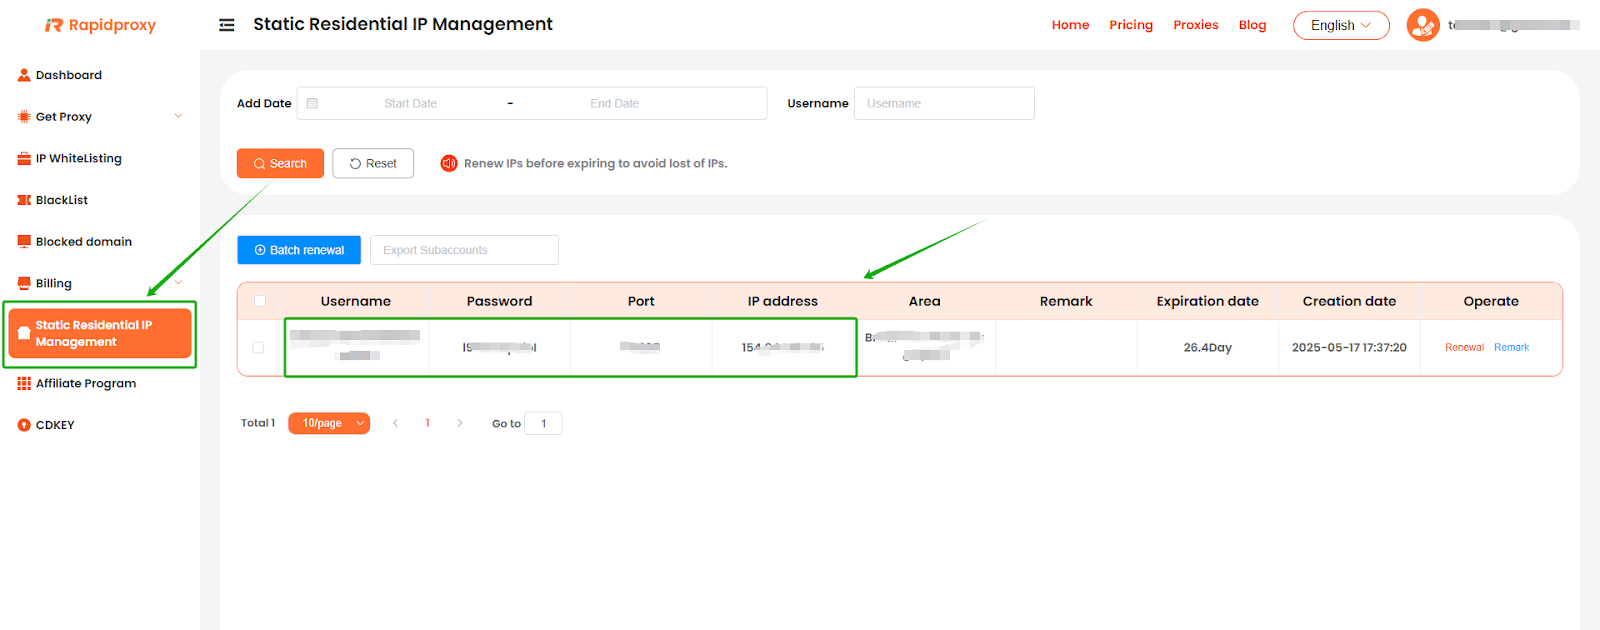
Step 1: Obtain Proxy Information
Log in to the RapidProxy dashboard, go to【Static Residential lP Management】, and obtain the proxy information:
IP Address : Port : Username : Password
Step 2: Configure the Proxy in MoreLogin
-
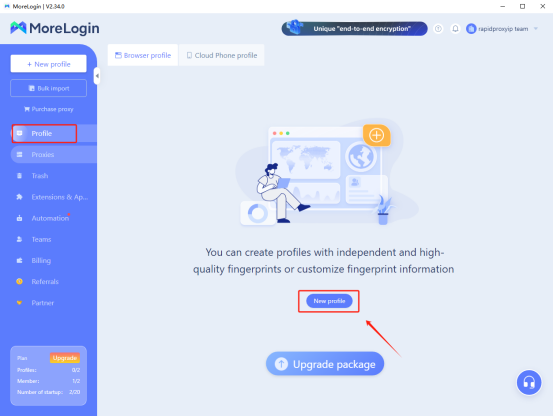
Create a New Profile
Click 【Profile】, then select 【New profile】.
-
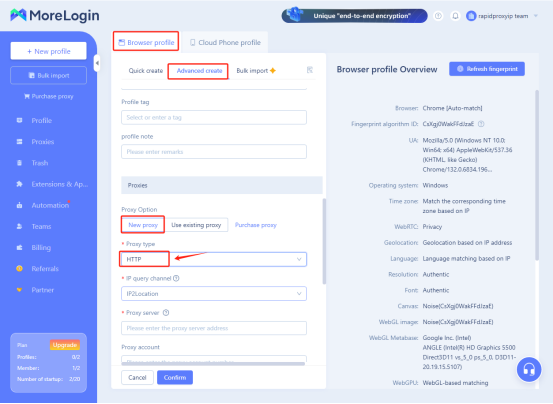
Set Proxy Type
- In the new profile, click 【Browser profile】, select 【Advanced create】, and then choose 【New proxy】.
- In the 【Proxy type】, select HTTP.
Note: This guide uses HTTP as an example. Rapidproxy supports HTTP(S) and SOCKS5 protocols.
-
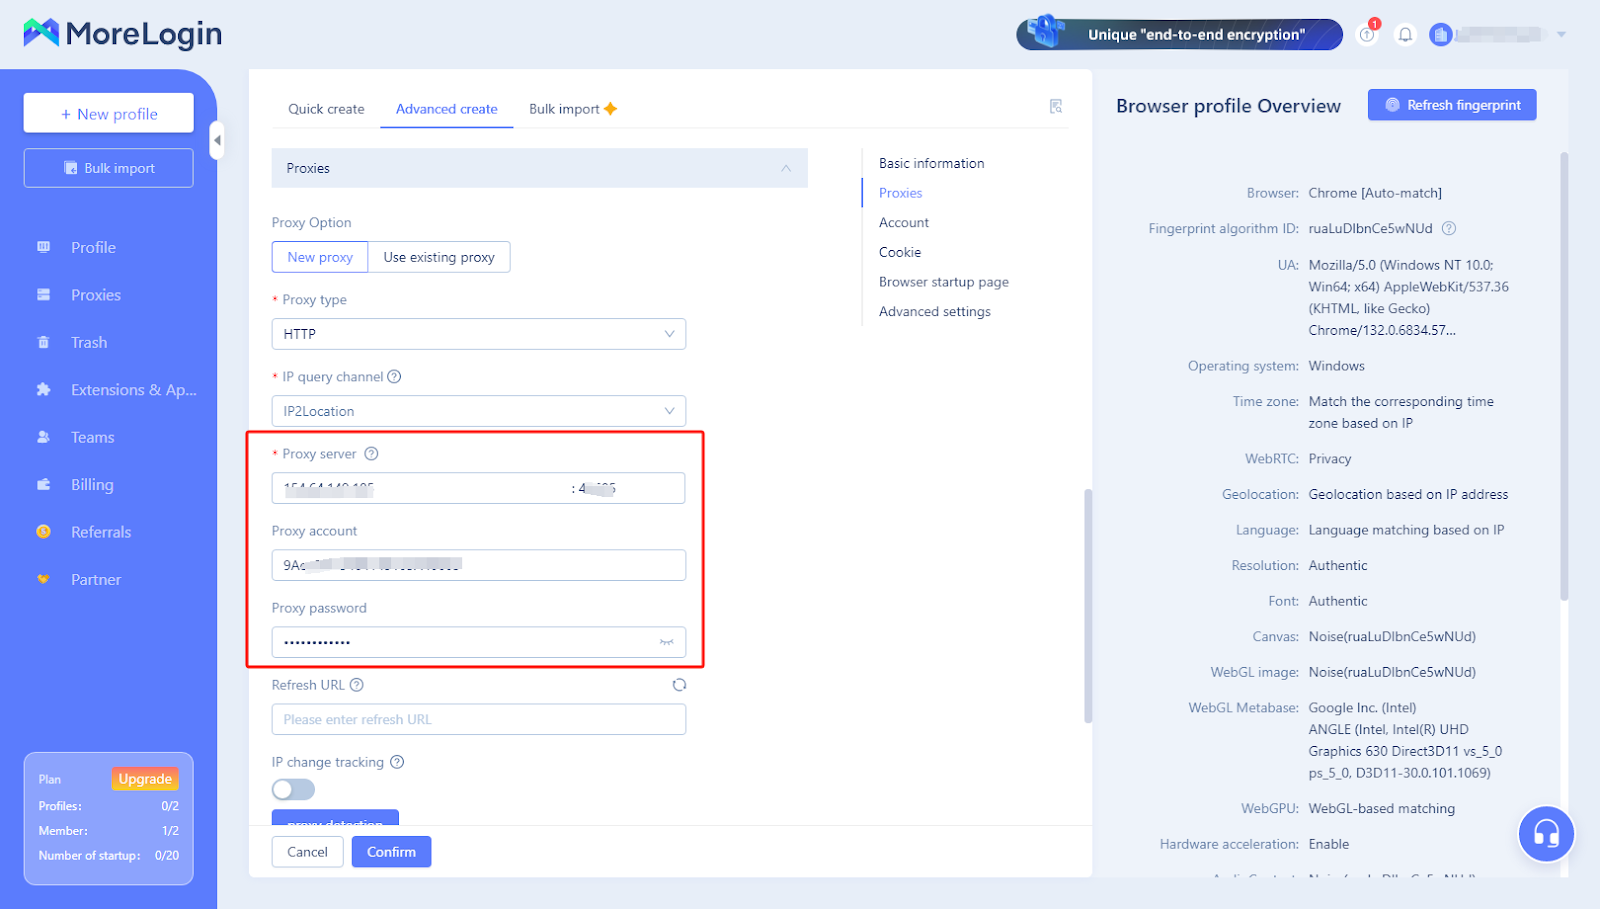
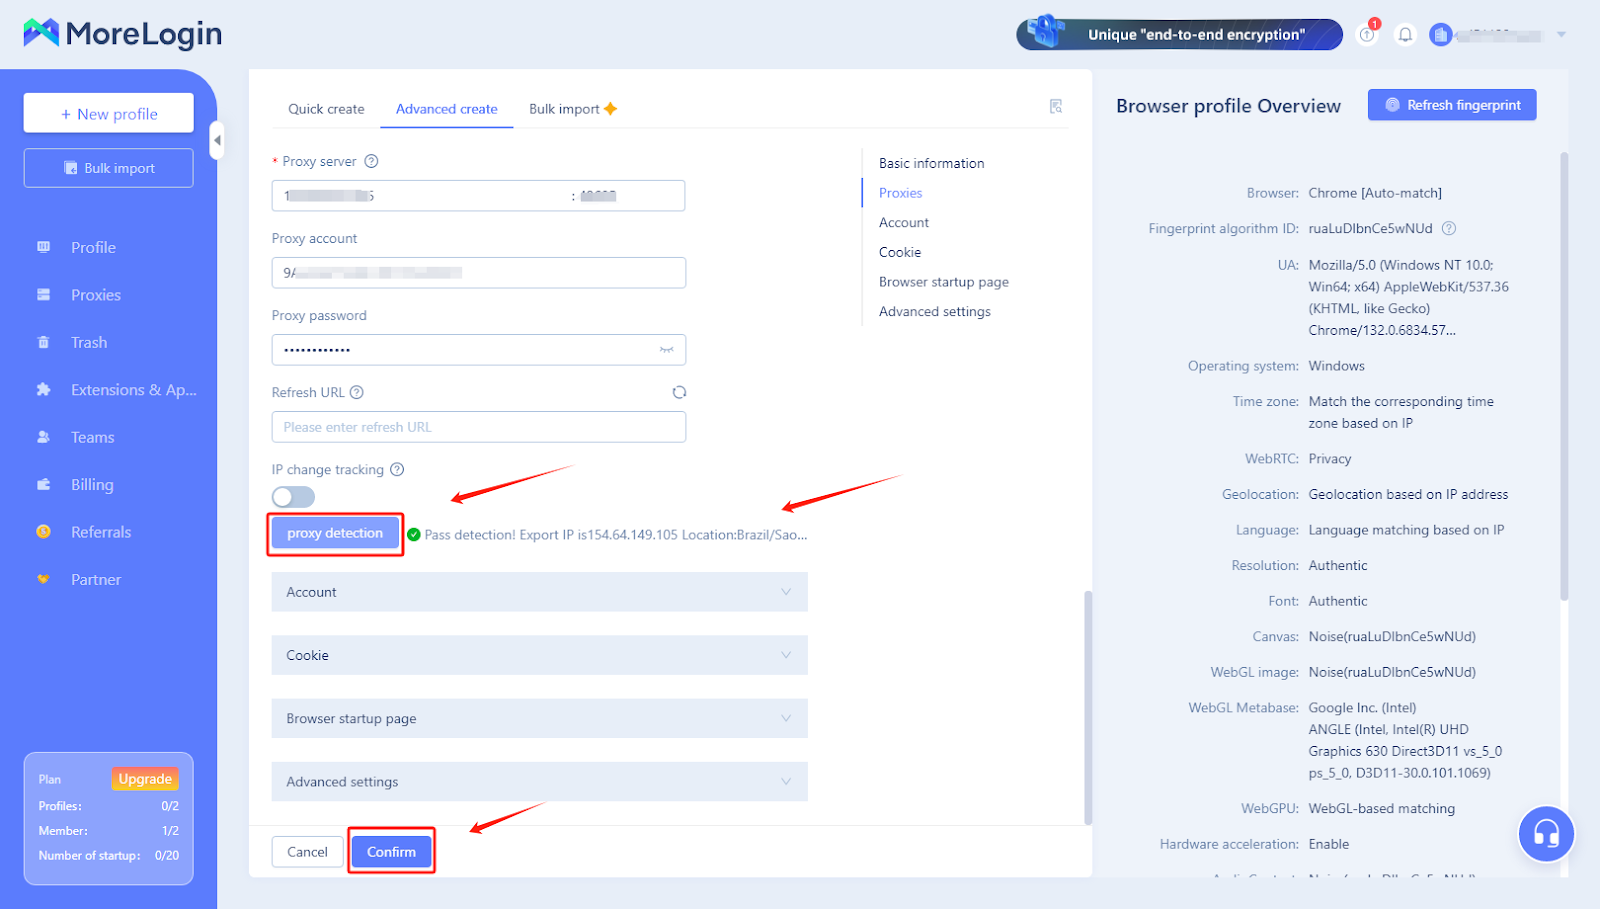
Enter Proxy Information
Paste the proxy information generated from Rapidproxy into the corresponding fields in MoreLogin.
-
Check Proxy Connection
- After configuration, click 【proxy detection】 to check if the proxy connection is working properly.
- If everything is normal, you will see the message "Pass Detection!", indicating that the proxy has been set up successfully.
- Click 【Confirm】 to save the configuration.
-
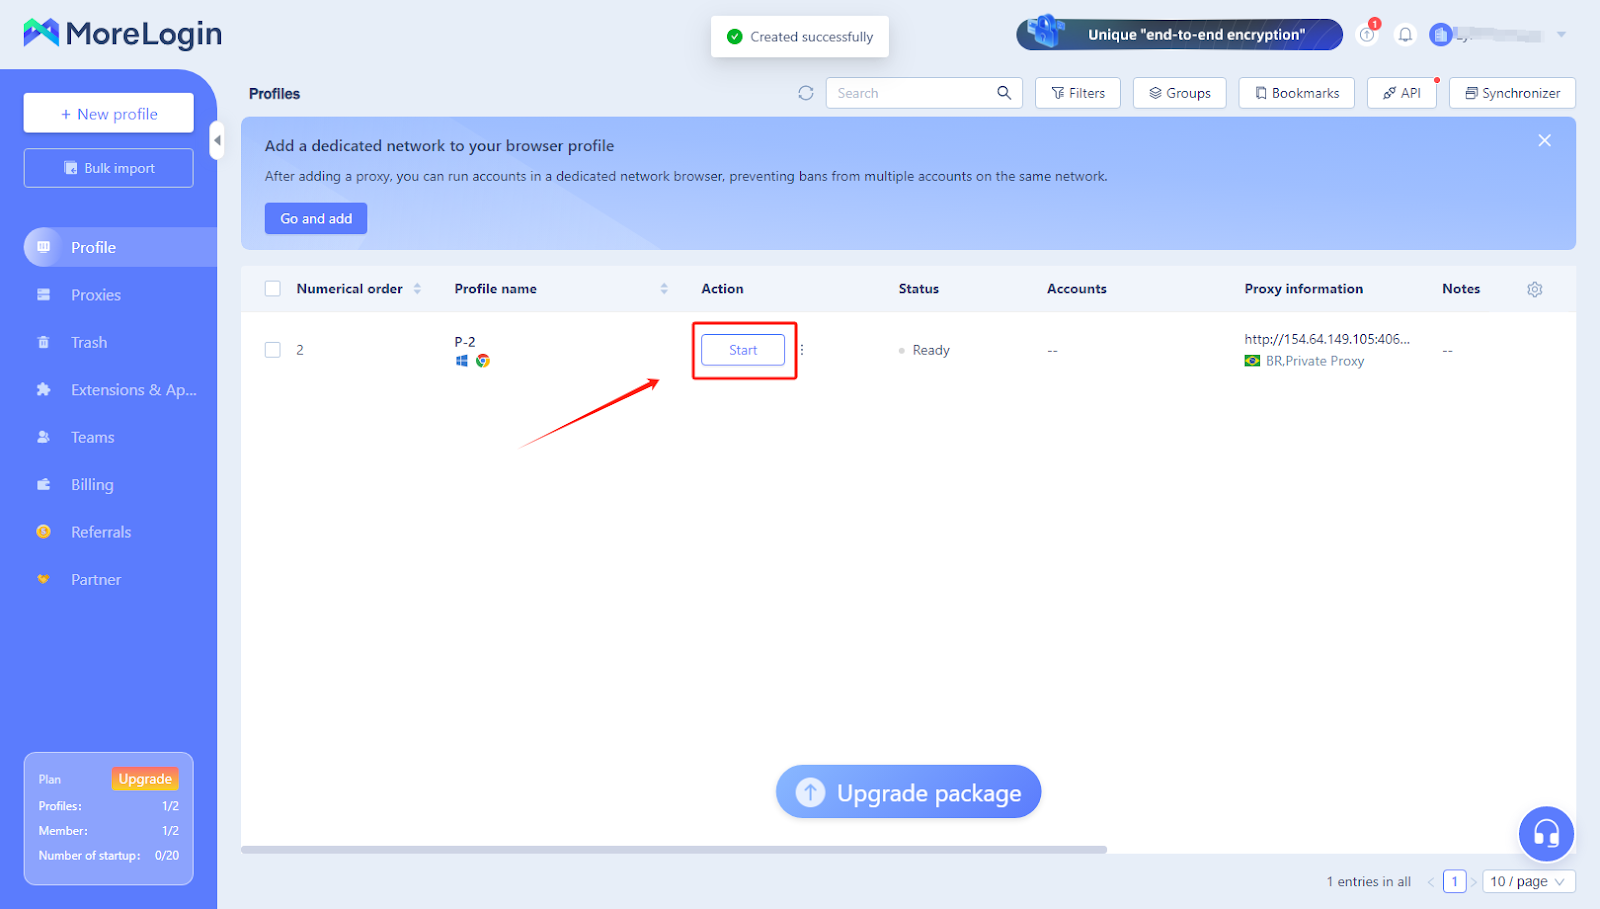
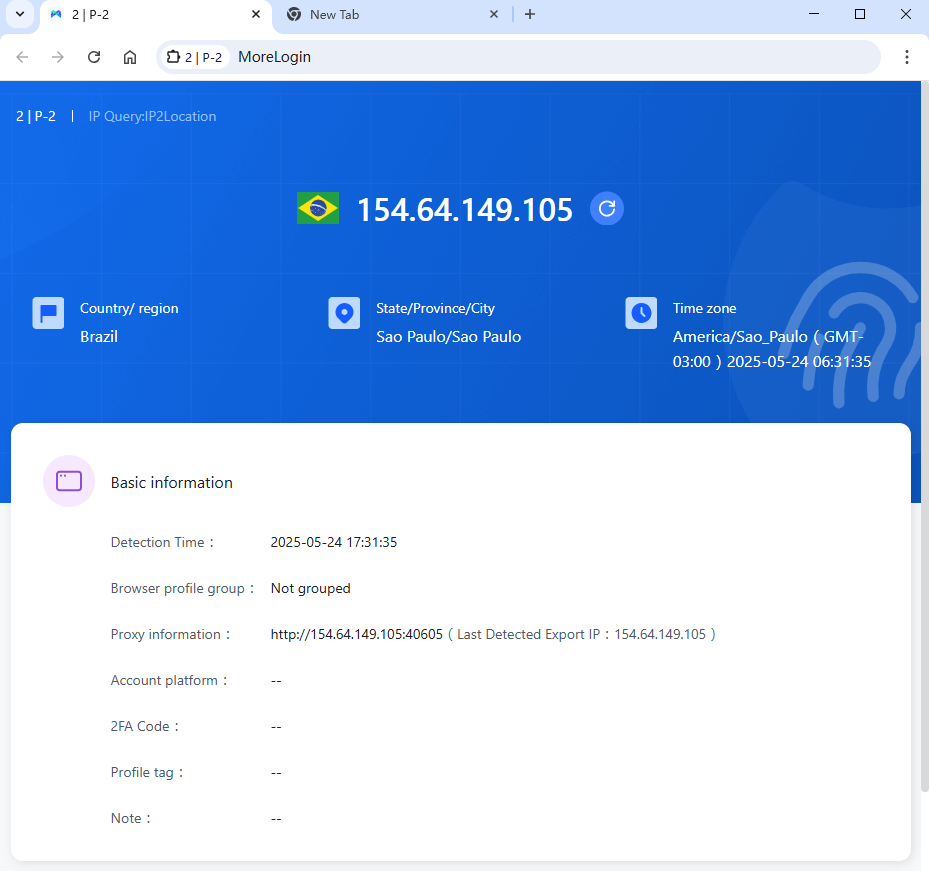
Start Using the Proxy
Click 【Start】 to begin using the configured proxy. You can now safely engage in online activities.
-
Contact Us


- Proxies
- Use cases
- Locations
- Terms and Services
- Programs
- Resources
 Email:
Friendly Links
Hubstudio
Bit Browser
vmoscloud
SMS-Activate
Undetectable browser
Dolphin{anty}
MuLogin指纹浏览器
FAN Browser
LALICAT Browser
PricingCraft
CPAEXCHANGE
Cloaking.House
DICloak Antidetect Browser
一合跨境
TGX account
Antidetect Browser Hidemyacc
Captchasonic
HQ-ACCOUNTS.COM
见远领航
见远跨境
GeeLark
BOB FARM
Money Safe
独角兽SCRM翻译器
风象出海
OMNILOGIN
WhitePage.House
CAPTCHAs.IO
Linken Sphere
IP Detection
GenLogin
pro-ak.store
SpiderBox 虫盒
DuoPlus Cloud Phone
MultiLoginPro
Gemlogin
GenFarmer
MostLogin
MoreLogin
NoCaptcha AI
VMLogin指纹浏览器
XLogin Antidetect Browser
BrowserScan
FB-Killa