How to Set Up Rapidproxy Proxy in Bitbrowser
Step 1: Obtain Proxy Information
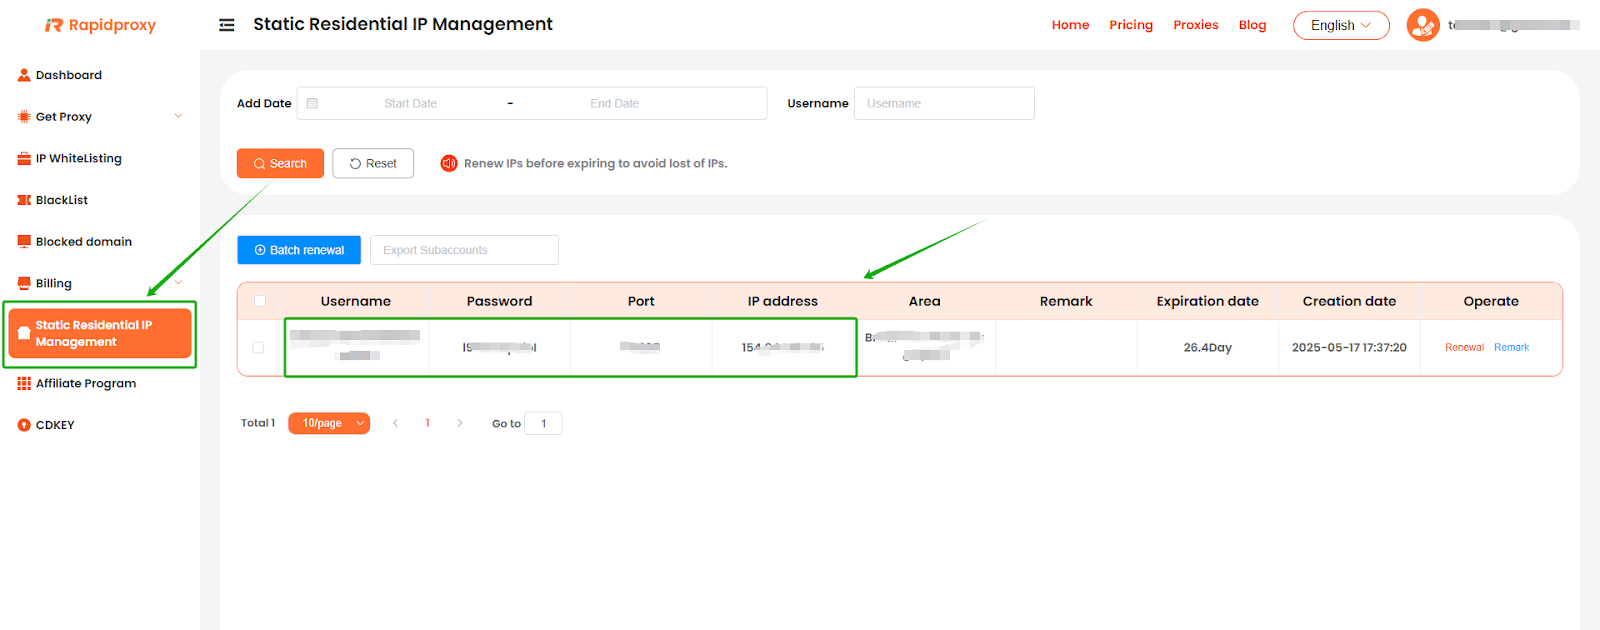
Log in to the RapidProxy dashboard, go to 【Static Residential lP Management】, and obtain the proxy information:
IP Address : Port : Username : Password
Step 2: Configure the Proxy in BitBrowser
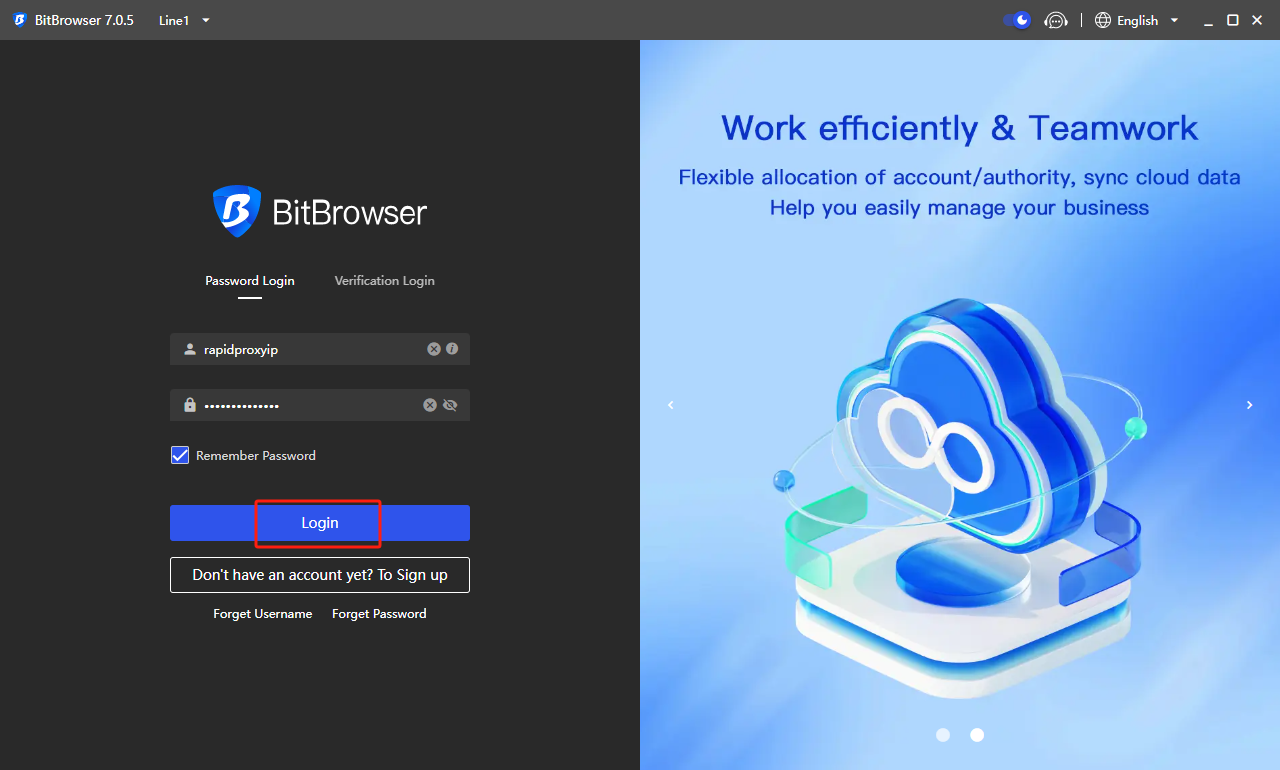
1. Log into Your Account
Launch the BitBrowser application and click 【Login】 to access your account.
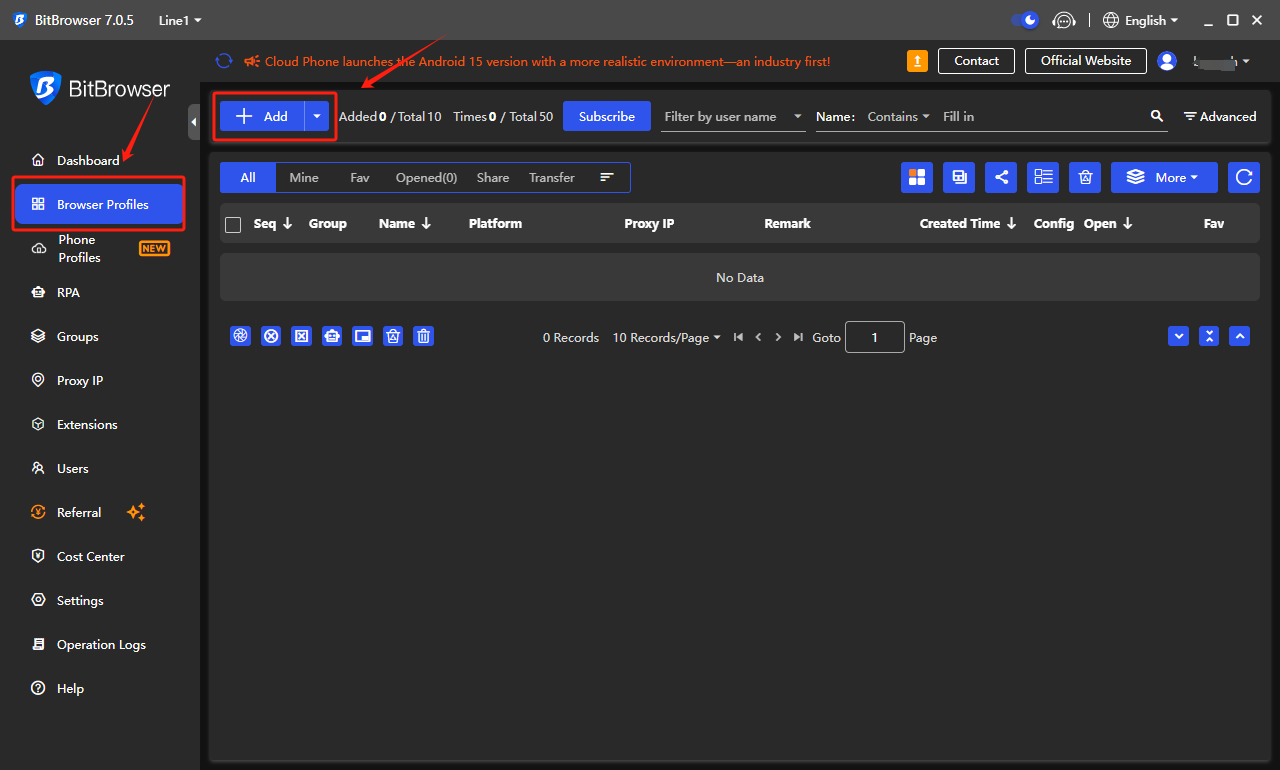
2. Create a New Proxy Profile
Navigate to the 【Browser Profiles】 section and click 【+Add】 to create a new browser profile for your proxy setup.
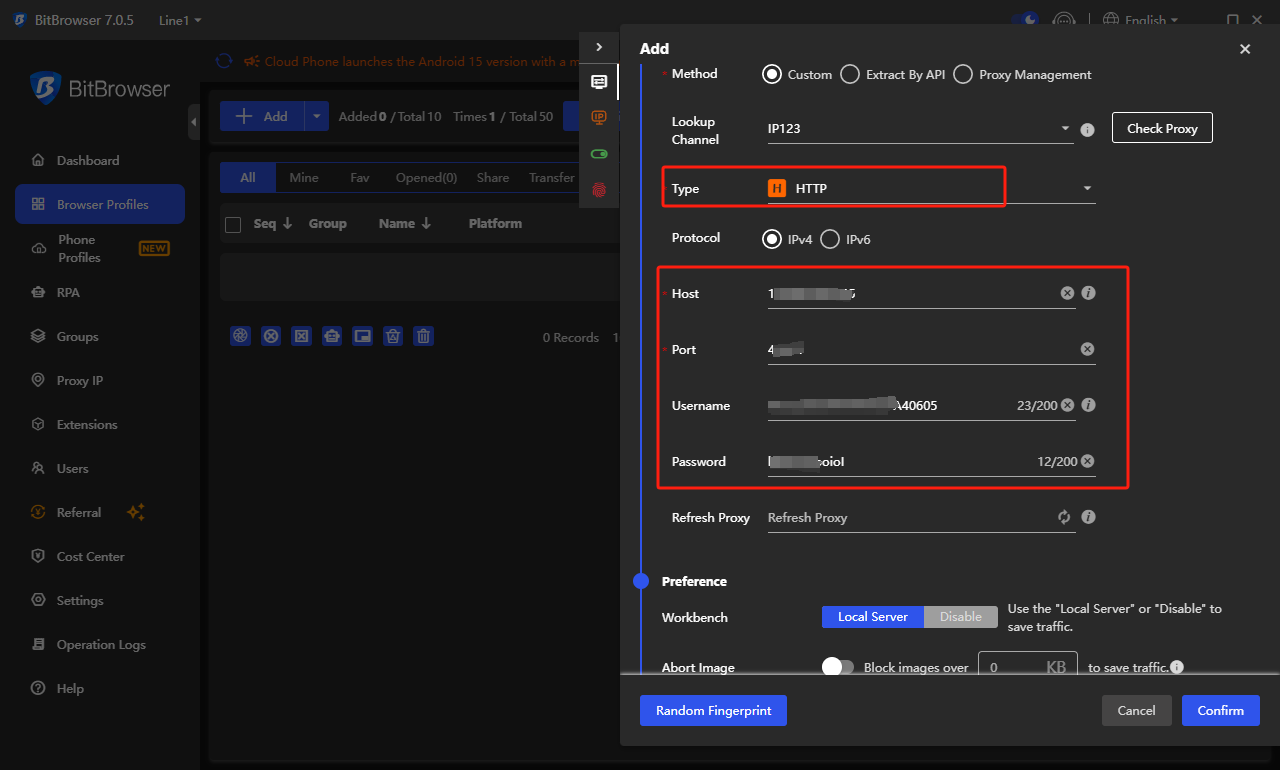
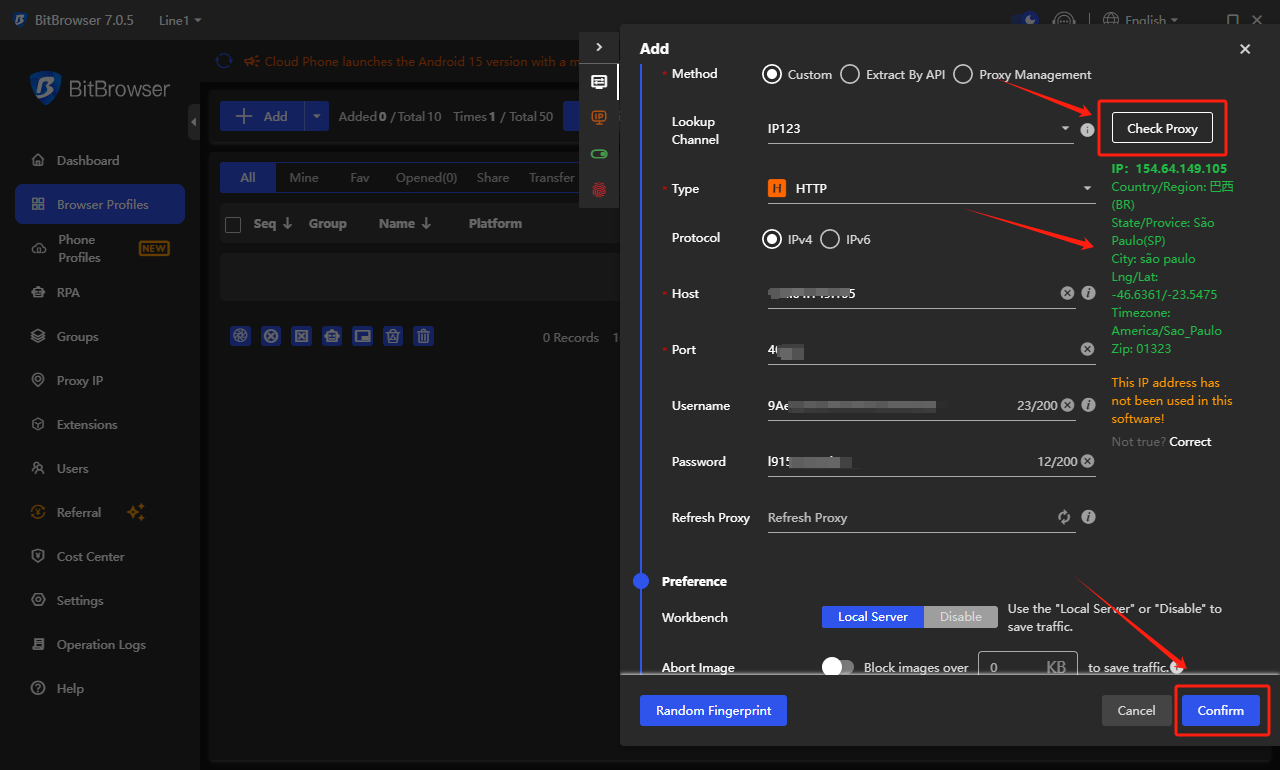
3. Enter Proxy Details
- In the Proxy Type dropdown, select 【HTTP】.
- Copy the proxy information provided by Rapidproxy (including IP address, Port, Username, and Password) and paste it into the corresponding fields in BitBrowser.
Note: This guide uses HTTP as an example. Rapidproxy supports HTTP(S) and SOCKS5 protocols.
4. Test the Proxy Connection
After filling in the proxy details, click 【Check Proxy】 to test the connection.
If the connection is successful, you will see detailed proxy information. At this point, your proxy has been set up correctly. Click 【Confirm】 to save the profile.
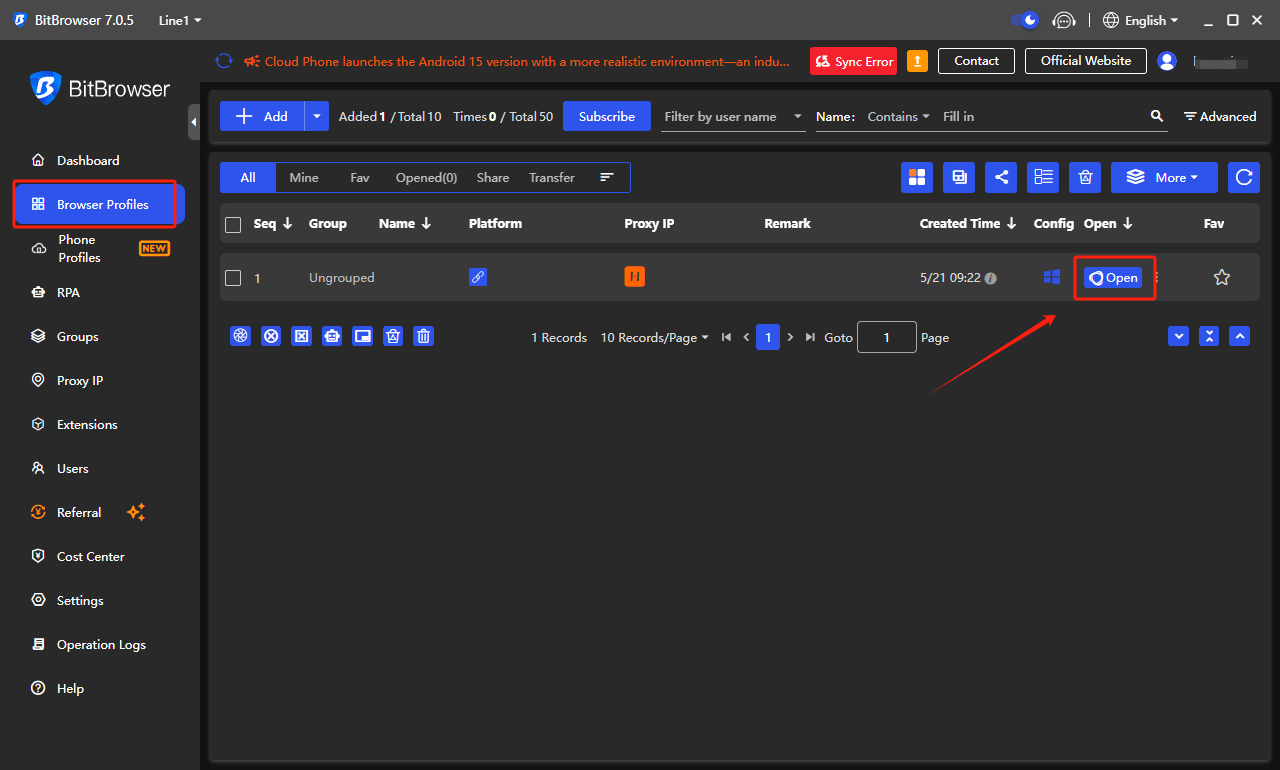
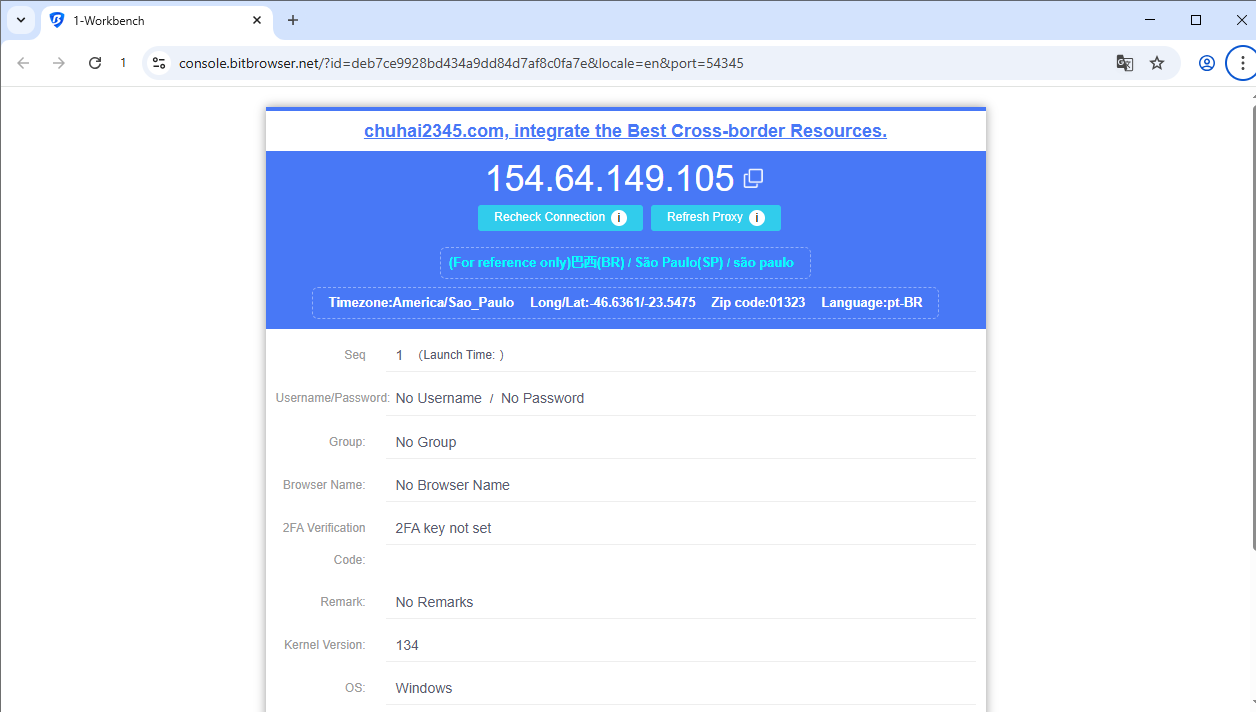
5. Start Using the Proxy
Return to the 【Browser Profiles】 page. Locate the profile you just created and click 【Open】 to launch a browser environment with the configured proxy.
You are now ready to perform secure, stable operations in BitBrowser using Rapidproxy.
-
Contact Us


- Proxies
- Use cases
- Locations
- Terms and Services
- Programs
- Resources
 Email:
Friendly Links
DuoPlus Cloud Phone
Undetectable browser
Bit Browser
vmoscloud
SMS-Activate
GeeLark
GenZolo Agency
CrazyFB.shop
FuncCards
MTWSPY
Linkbuilder
Vibero CRM
Overlaxed Cloud
Adligator
Affiliate.Watch
TK Cloud Master
hoax.tech
deiter-shop.ru
AdsPower防关联浏览器
Scrappey.com
Maslogin
RentPhone USA
Onirent
AccountDiversity
CaptchaAI
Hubstudio
Dolphin{anty}
MuLogin指纹浏览器
FAN Browser
LALICAT Browser
PricingCraft
CPAEXCHANGE
Cloaking.House
DICloak Antidetect Browser
一合跨境
TGX account
Antidetect Browser Hidemyacc
Captchasonic
HQ-ACCOUNTS.COM
见远领航
见远跨境
BOB FARM
Money Safe
独角兽SCRM翻译器
风象出海
OMNILOGIN
WhitePage.House
CAPTCHAs.IO
SocialEcho
蘑菇跨境
0DETECT
SocNet
FlashID
棱镜浏览
零录AI
CRAZYSHOPS.RU
Pay2.House
PionLogin
Omocaptcha
Moimobi 营销云手机
SMSBOWER
Antic Browser
MaxCloudPhone
VPN.Promo
候鸟指纹浏览器
Linken Sphere
IP Detection
GenLogin
pro-ak.store
SpiderBox 虫盒
MultiLoginPro
Gemlogin
GenFarmer
MostLogin
MoreLogin
NoCaptcha AI
VMLogin指纹浏览器
XLogin Antidetect Browser
BrowserScan
FB-Killa