Setting Up Proxy Using MoreLogin
Step 1: Log In
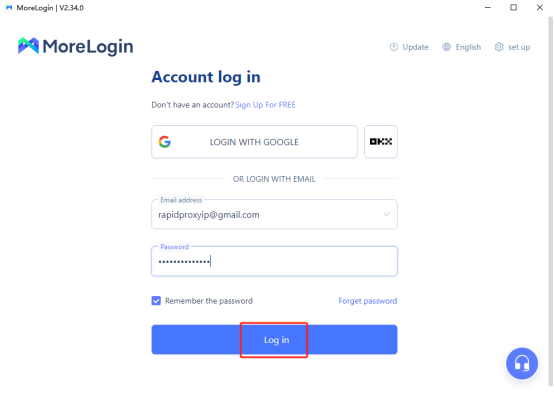
Open the MoreLogin browser and click 【Log in】 to access your account.

Step 2: Create a New Profile
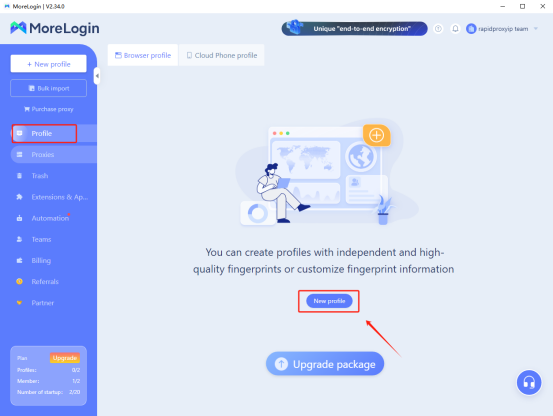
Click 【Profile】, then select 【New profile】.

Step 3: Set Proxy Type
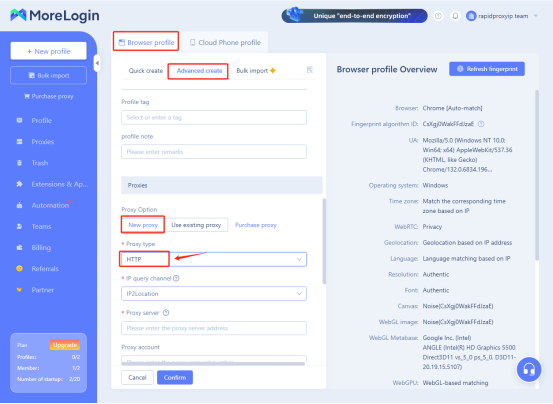
- In the new profile, click 【Browser profile】, select 【Advanced create】, and then choose 【New proxy】.
- In the 【Proxy type】, select HTTP.
Note: This guide uses HTTP as an example. Rapidproxy supports HTTP(S) and SOCKS5 protocols.

Step 4: Enter Proxy Information
Paste the proxy information generated from Rapidproxy into the corresponding fields in MoreLogin.
- How to Get Residential Proxies by APl?
- How to Get Residential Proxies by User & Pass Auth?
Step 5: Check Proxy Connection
- After configuration, click 【proxy detection】 to check if the proxy connection is working properly.
- If everything is normal, you will see the message "Pass Detection!", indicating that the proxy has been set up successfully.
- Click 【Confirm】 to save the configuration.
Step 6: Start Using the Proxy
Click 【Start】 to begin using the configured proxy. You can now safely engage in online activities.

 Email:


