RapidProxy Configuration Steps in Maskfog Browser
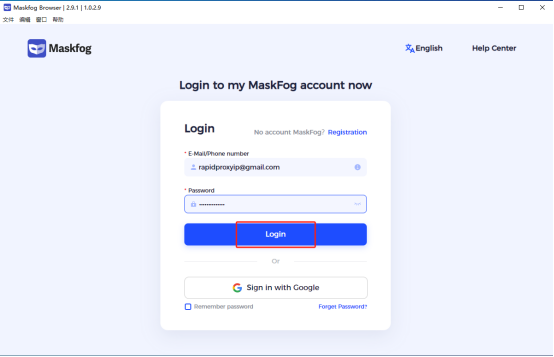
Step 1: Log in to Maskfog Browser
Open the Maskfog browser and click on 【Login】 to access your account.
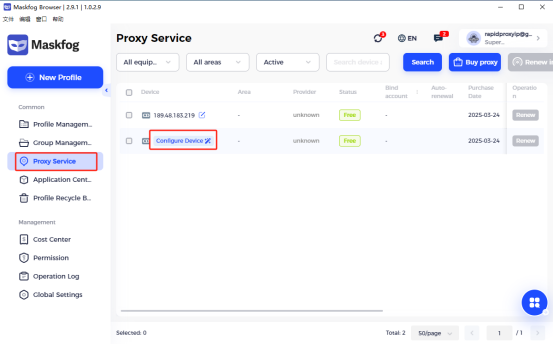
Step 2: Configure Proxy Service
Click on 【Proxy Service】, then select 【Configure Device】.
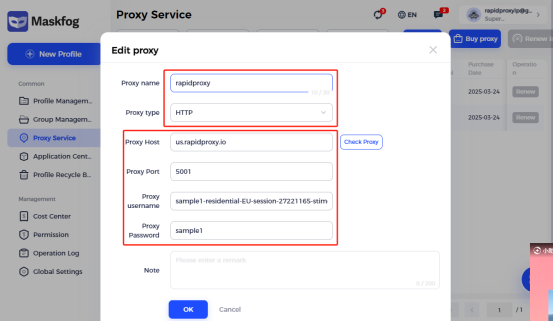
Step 3: Enter Proxy Information
Enter your 【Proxy Name】 and select the 【Proxy Type】.
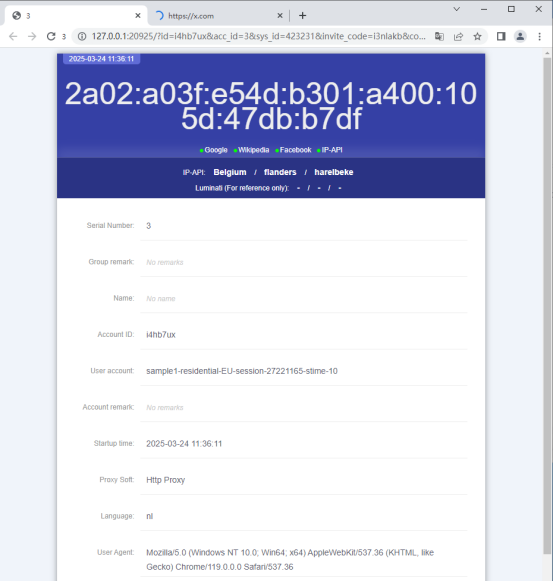
The proxy information generated in RapidProxy should be pasted into the corresponding fields in Maskfog.
Note: This guide uses HTTP as an example. Rapidproxy supports HTTP(S) and SOCKS5 protocols.
- How to Get Residential Proxies by APl?
- How to Get Residential Proxies by User & Pass Auth?
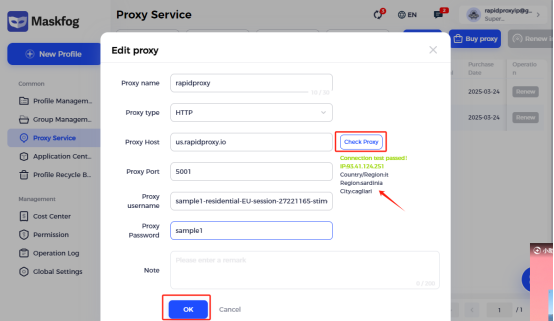
Step 4: Check and Save Proxy Configuration
- Once configured, click on 【Check Proxy】 to test the connection. If the connection is successful, you will see the message “Connection test passed!”
- Click 【OK】 to save the proxy configuration.
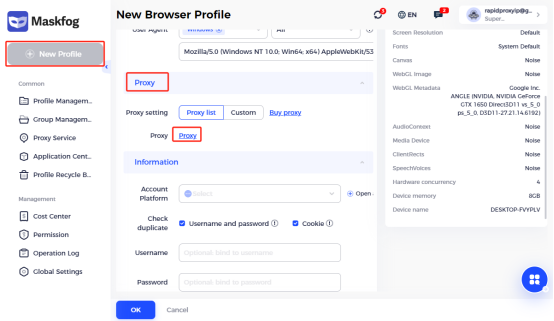
Step 5: Create a New Profile
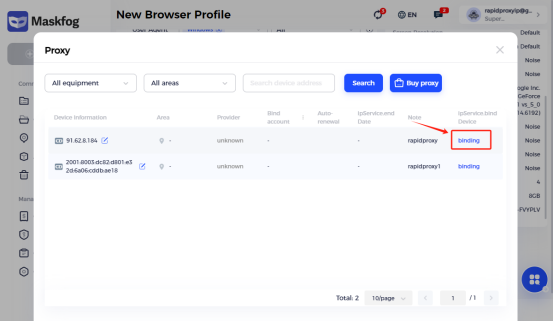
Click on 【New Profile】.Find 【Proxy】 - 【proxy】.Click on 【Binding】.
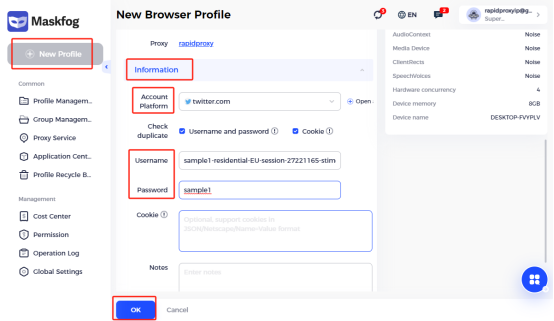
Step 6: Fill in Account Information
Select 【Information】 and fill in your account details.After successful import, click 【OK】.
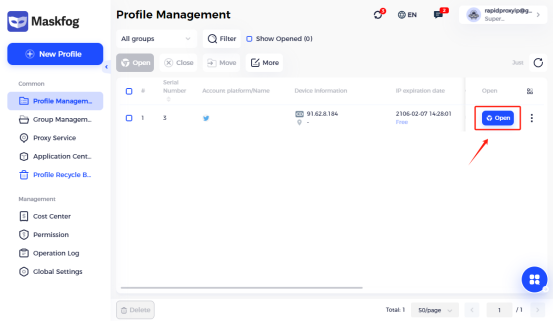
Step 7: Start Using the Proxy
Go to the 【Profile Management】 page and click 【Open】 to begin using the configured proxy.You can now safely conduct online activities.
-
Contact Us


- Proxies
- Use cases
- Locations
- Terms and Services
- Programs
- Resources
 Email:
Friendly Links